
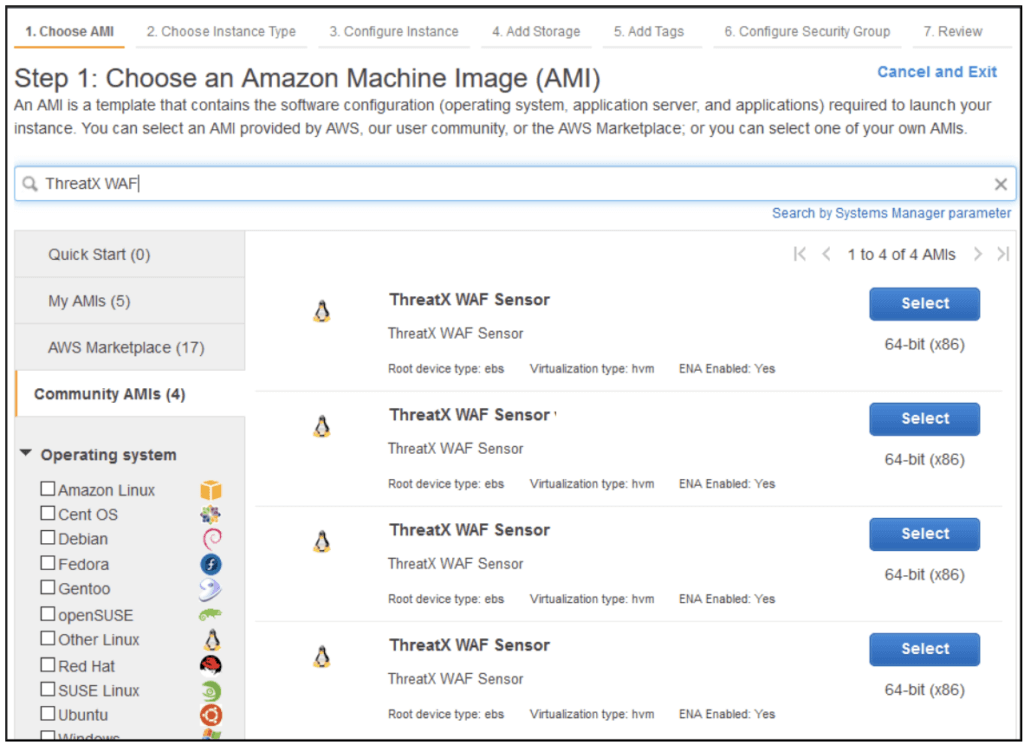
The ThreatX WAF Sensor AMI can be used to quickly and easily add application security to applications
deployed in AWS VPCs. The AMI can be found by launching an instance and searching for “ThreatX WAF” when choosing an AMI.
Attributes
The AMI has the following attributes:
- Based on the latest (at the time of publishing) CentOS AMI
- Pulls the latest version of the txWAF Sensor container from Docker Hub at instance launch and on service restart
- Restarts the txWAF docker container if it stops
- Can be orchestrated via User-Data
Minimum Requirements
Instance size of t3.micro or larger to satisfy the minimum requirements of 2 CPU cores and 1 GB RAM.
Disk size should be a minimum of 20 GB.
Launching the AMI
In the simplest deployment, the AMI can be launched with the following User-Data information:
#cloud-config

write_files:

 - path: /etc/txconf

   content: |

     CUSTOMER={{customer_name}}

     API_KEY={{customer_sensor_key}}

     RESOLVER=local

     SENSOR_TAGS=tag1,tag2
Note: This example is provided yml format. Spaces must be used when formatting this data, and not tabs or other whitespace characters/indentation methods.
You can set the SENSOR_TAGS variable to a comma delimited list of tags that can help you filter the sensors within the ThreatX Dashboard UI or API.
Troubleshooting
The AMI is based on a CentOS build and the centos user can be used to login. Make sure to reference your private ssh key when connecting: $ ssh -i sshkey.pem centos@200.1.1.1
Once logged in, you can sudo su to get root access.
sudo suTo see the AMI version, run this command on either the CentOS host or within the ThreatX WAF container.
echo $TXWAF_AMI_VERSIONTo follow the CentOS system log, run
journalctl -fTo see the ThreatX WAF docker container, run
docker psTo get a shell into the ThreatX WAF container, run
docker exec -it txwaf bashLast Updated 2023-03-09
